
Here are the parts I bought:
Autopilot, GPS, Power Module – Pixhawk 4 Mini PX4 Autopilot Combo Pack: https://www.unmannedtechshop.co.uk/product/pixhawk-4-mini-px4-autopilot-combo-pack-aluminum-case/
Telemetry (optional for easy configuration) – 100mW Ardupilot Unmanned Telemetry Kit V3 (433MHz): https://www.unmannedtechshop.co.uk/product/100mw-ardupilot-unmanned-telemetry-kit-v2-433mhz/
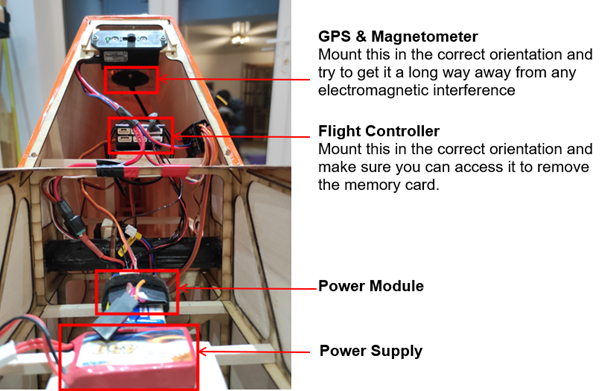
Hardware Installation
Just plug everything in and strap it in your plane. It’s a little more involved than mounting a receiver as you have to make sure to mount the flight controller and the GPS in the correct orientations. However, if you can’t get them in the right orientation there are parameters you can set to correct for that. Check here for more info: https://ardupilot.org/copter/docs/autopilot-assembly-instructions.html
Configuration
1. Install Mission Planner on Your PC
I followed these instructions: https://ardupilot.org/planner/docs/mission-planner-installation.html
2. Flash Firmware
The Pixhawk comes with the px4 firmware loaded on it by default, but Flight Coach uses the the logs generated by the Ardupilot firmware. You can flash Ardupilot onto the board using Mission Planner. I followed these instructions: https://ardupilot.org/planner/docs/common-loading-firmware-onto-pixhawk.html

First, select the COM port the board is plugged into in the top right of the window. If you are not sure you can select AUTO. The baud rate (box to the right) can be set to 115200. Next, select setup, Install Firmware and choose the one with the picture of the plane.
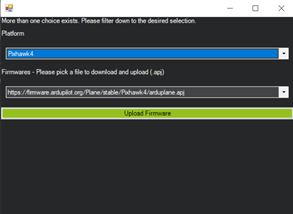
A popup box shows up asking you to confirm the Platform. Choose PH4 Mini here.
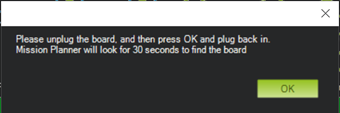
The final step is reasonably self-explanatory. After this, for me there was no confirmation that the installation was complete except that the status bar had gone all the way across. I had to select the com port again (re-setting it to Auto also works), then click connect at the top right and wait for the parameters to be loaded. After that you can go to the DATA tab at the top and see the virtual horizon change as you move the board.
3. Setup the Telemetry
Telemetry is not essential, but it makes configuring the firmware a lot easier. I followed the instructions here: https://ardupilot.org/copter/docs/common-configuring-a-telemetry-radio-using-mission-planner.html. I only use the telemetry radios for the accelerator and magnetometer calibration stages and remove them before flight to avoid any potential risks associated with interference.
4. Configure the Autopilot
Finally you need to calibrate the autopilot and set a few parameters to make it generate logs for the Flight Coach plotter. Have a look at the instructions on our Log Capture page.